
Blog & Resources
Stay Up to Date!Organize Your PowerPoint Slides into Sections

Have you ever been overwhelmed trying to organize all of the slides in your PowerPoint presentation? Keeping track and organizing a PowerPoint presentation with a large number of files can be difficult.
In Microsoft PowerPoint 2010, use the new Sections feature to manage your slides with ease.
Why Use Sections?
- Group all related slides under one section.
- Use Sections to outline the topics for your presentation.
- Name each section to keep track of each group of slides.
- Assign a section to a colleague to make ownership clear during collaboration.
- Collapse all sections and expand a specific section to work on one section at a time.
- Move a Section of Slides by dragging them up or down.
- Remove a Section of Slides.
- Print only a specific section.
Split Text from One Cell into Columns
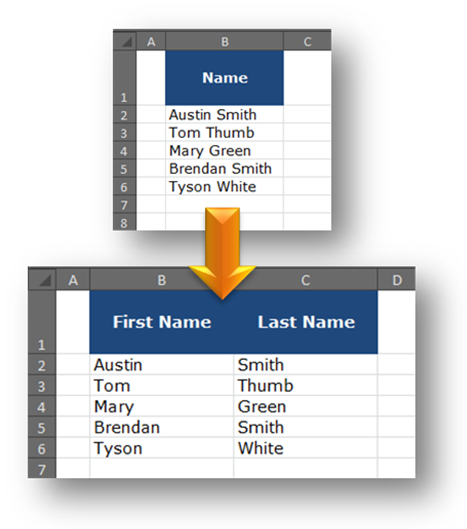
In Excel you may have text within one cell that you want to split. For example, if a cell contains first and last names you may wish to separate first and last name into different columns.
In Excel 2007 and 2010 the Convert to Columns Wizard uses a delimiter (tab, semicolon, comma, space, or custom) to determine where to separate the cell contents into different columns.
1. Select the cells that you want to convert to columns, as shown below.

2. On the Data tab, in the Data Tools group, click Text to Columns.

Click the Read More button for the rest of the directions.
Your Computer Mouse – Why a Second button?
?") There are 2 ways to click your computer mouse:
There are 2 ways to click your computer mouse:
- Left-click (usually done with the index finger)
- Right-click (usually done with one of your outer fingers)
Note: As most computer users are right-handed these 2 buttons are known as the left-click and the right-click.
Here is an analogy that I often use to explain the functionality of both the left-click and the right-click of a computer mouse:
A computer mouse is similar to a car in North America.
In a car in North America the driver sits in the left seat, while the passenger occupies the right seat. The passenger may come up with a number of suggestions where to go. However, the driver of the car is the one who ultimately decides which suggestion to take.
When you right-click the mouse, all of the options available are displayed as a menu. In order to choose one of the options from the menu, left-click on it.

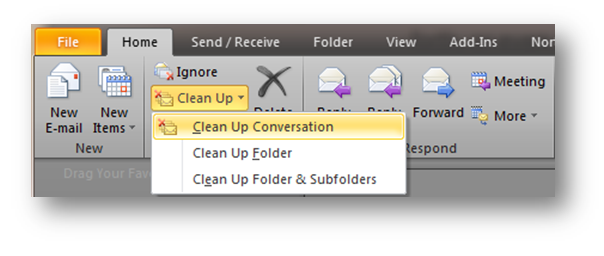
In Microsoft Excel format the selected cells with a right-click of the mouse, as shown below.
Note: The commands displayed on the right-click menu depend on what you right-click on.
Click the Read More button to find out the benefits of using the Right-click.